Eko Studio is our high-level tool for creating interactive video experiences, and the eko-cli is the toolkit that lets you look under the hood and operate on the underlying code.
To create a project in Eko Studio, follow our Eko Studio guidelines.
Once you’ve got your project up and running in Eko Studio, you can set up your local development environment for two-way development. The main tool you will be using is our command-line tool, the Eko CLI. To start using it, you join Eko Studio, agree to the terms of use and open your account.
Setting up the environment
Step 1: Registration
Go to Eko Studio and click on “Join”, agree to the terms of use and open your account.
Then, go to your inbox. There will be a message from Eko asking you to verify your account. Verifying the account is extremely important, because you’ll need to have your email address verified before you can deploy your project.
Step 2: Installing the command-line tool
Before installing Eko CLI make sure your environment includes:
- NodeJS v6 and up
- npm
The Eko CLI is a universal developer tool which allows you to perform all the tasks to create and deploy interactive projects. Open a terminal or command prompt and enter:
npm install -g eko-cli
(This might require administrative privileges).
This may take a while. Once the installation is complete, the eko command will be available globally and can be invoked from any working directory.
Step 3: Logging in
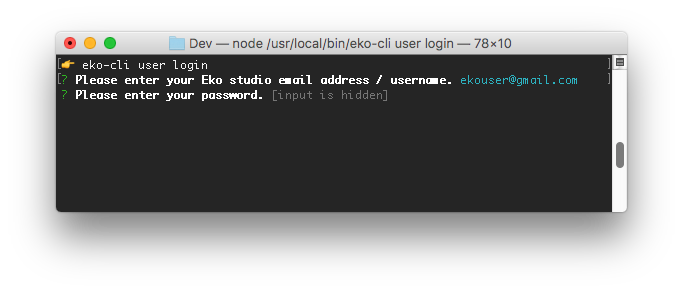
To log in with the user you just created, type in:
eko user login
You will then be prompted to enter the email address you registered with and your password:
Once you are logged in, you can start modifying your Eko Studio projects using
Using the command-line tool
The Eko command line tool offers different namespaces for different tasks. The relevant namespaces are: user and studio.
The basic usage is:
eko [namespace] [action] [--parameters]
You can read more here on testing your project.
You can read more here on the project structure.